





Table of Contents
Quick Summary
- Trampoline assembly difficulty should be considered before buying, as it can vary significantly by design, size, and enclosure system.
- Frame design, clear instructions, labelled parts, and logical packaging can make assembly faster and reduce alignment or reassembly issues.
- Spring installation and enclosure setup are generally the most time-consuming stages, especially for full-size backyard trampolines.
- Larger trampolines usually require more work because they have more springs, frame sections, and enclosure components, although efficient designs can offset this.
- Before buying, check the required tools, availability of a second helper, material quality, weight capacity, safety features, replacement-part availability, and owner reviews to set realistic assembly expectations.
- Overall, easy assembly can indicate thoughtful product design and better component fit, so reviewing owners’ assembly experiences can be a valuable part of the buying decision.
Courtesy - Magnific
Most people choose a trampoline on bounce quality and safety features, then discover the part nobody mentioned in the listing. The box arrives, and what follows is an afternoon on the lawn with a bag of hardware, a diagram that assumes you already understand it, and a set of springs that fight back.
Assembly deserves more weight in the buying decision than it usually gets. Not only because a difficult build ruins a Saturday, but because how a trampoline goes together tells you something about how it was designed. Clear instructions, connection points that line up, and parts that fit consistently tend to produce a more stable finished structure with fewer alignment problems. A build that requires constant re-adjustment is often a build that will need re-adjusting again later.
This guide covers what actually determines assembly difficulty, so you can read a product listing and form a realistic expectation before anything is delivered.
Where the Hours Actually Go
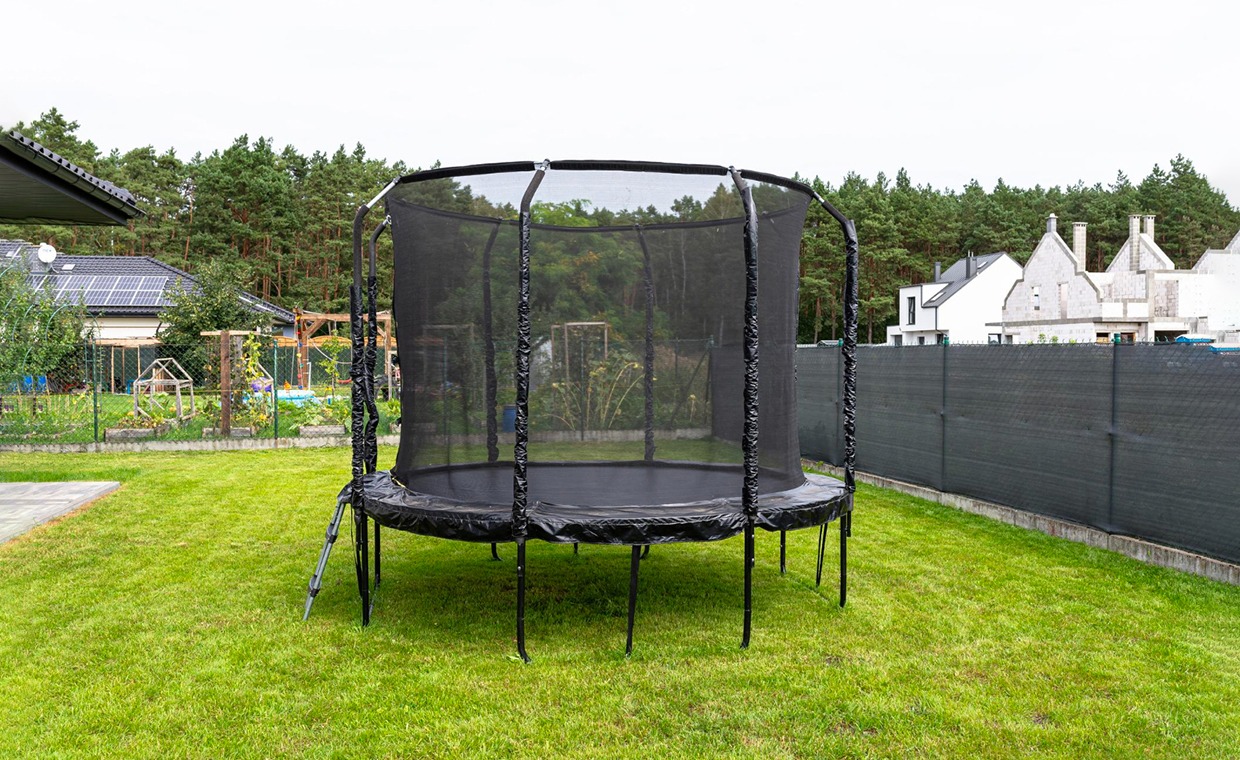
A traditional backyard trampoline follows a predictable sequence: frame sections, legs, springs, mat, then the enclosure.
The first two stages are usually fine. It’s the last three that consume the day. Spring installation is repetitive work, and the repetition is the problem rather than the difficulty of any individual spring. On a full-size model there are a great many of them, each requiring tension, and fatigue sets in long before the last one goes on. Enclosure installation is the other major cost, and it frequently proves harder than expected because it happens at the end, when patience is already thin.
Between those two stages sits most of the difference between a two-hour build and an all-day one. Any design feature that reduces the repetitive work or simplifies how the enclosure attaches will affect your setup experience more than anything else in the specification.
Frame Design and How Parts Connect
The frame is where good and bad assembly experiences separate.
What you want are designs that limit complicated fastening and hold alignment naturally as you build. What causes trouble is any system requiring you to loosen and re-tighten parts repeatedly to get holes to line up. That backtracking is invisible in a product description and painfully obvious on the day, and it’s the single most common reason a build overruns.
When comparing models, look at how many separate connection points the frame uses and how much hardware is involved in each one. Fewer fastening operations generally means fewer opportunities for misalignment, and a frame that comes together cleanly the first time tends to stay square once it’s standing.
Instructions and How the Parts are Packed
This sounds minor. It isn’t.
Clear diagrams, consistent labelling and logical packaging prevent two specific failures that account for a large share of lost time. The first is assembling components in the wrong order, which almost always means partially dismantling what you’ve built to correct it. The second is simply not being able to find the right part, because similar-looking hardware arrived in one unmarked bag and now you’re sorting bolts on the grass.
Neither of these is a difficult problem to solve at the manufacturing stage, which is why the brands that get it right and the ones that don’t are usually consistent about it. Owner reviews are the practical way to check, because instruction quality is one of the things people mention without being asked.
How the Enclosure is Integrated
Many trampolines feel manageable until the safety net goes on.
The distinction worth understanding is whether the enclosure was designed as part of the whole system or added to a frame that was designed without it. Integrated enclosures tend to attach predictably, with poles and fixings that correspond to the frame’s own geometry. Enclosures treated as an accessory tend to require improvisation, and improvising with a net at head height while holding a pole is where most people’s goodwill runs out.
Since the enclosure is also the primary safety component, this matters beyond convenience. A net that was awkward to fit is a net more likely to have been fitted imperfectly.
Size and Shape Change the Arithmetic
Bigger trampolines are generally harder to assemble, and the reason is straightforward: more springs, more frame segments and a larger enclosure. Every dimension you add multiplies the repetitive work rather than adding to it.
That said, size and difficulty aren’t locked together. A larger model engineered specifically for faster assembly can be less work than a smaller one that wasn’t. Design intent outweighs dimensions.
Shape affects the feel of the finished product more than the build. Square trampolines are often chosen because the jumping area feels more generous, while round models remain the most common configuration and the one most yards are planned around. Both follow broadly the same assembly pattern.
Compact and folding models are a genuinely different proposition. There’s less material, fewer components to align and no full-size enclosure, so setup is faster and less intimidating. They also serve a different purpose, suited to indoor use, garages, patios and smaller spaces, and they don’t replace the backyard family trampoline experience. If your requirement is somewhere for children to play outside, a folding indoor model isn’t a shortcut to that.
Tools, Helpers and the Day Itself
Most trampolines are designed to be built with ordinary household tools, and the manufacturer’s instructions should specify what you need before you start rather than halfway through.
The exception worth checking is a spring-loading tool. Spring installation is significantly easier with one, and some kits include it while others assume you’ll manage. If it isn’t listed, that’s worth knowing in advance.
Have a second person available. Assembly time varies enormously with the number of helpers, and some stages, particularly enclosure installation, are genuinely awkward alone. Experience matters too, which is worth remembering when you read a review claiming a build took ninety minutes. That person may have assembled one before.
Materials and Specifications Worth Checking
A few details in the specification affect both the build and what happens afterwards.
Galvanised steel frames resist rust, which matters for anything left outdoors permanently. UV-resistant mat and enclosure materials hold up better against sun exposure, which is the other thing that degrades a trampoline sitting in the open. Padded poles and protective covers over the springs and frame edges are standard safety provisions and worth confirming are included rather than sold separately.
Check the stated weight capacity against realistic use. Mixed-age households and larger families should be looking at a higher figure than a single-child home, and it’s a specification people tend to skim.
Independent certification of manufacturing and material standards is a useful signal because it’s verified by someone other than the seller. It doesn’t tell you the trampoline will be easy to assemble, but it does tell you the components were made to a checked standard.
After the Build
Two things extend the life of a trampoline more than anything in the specification.
Seasonal care and storage matter in harsher climates. Even a rust-resistant frame lasts longer if it isn’t left exposed through a severe winter, and mats and nets suffer most from prolonged weather exposure.
Access to replacement parts and responsive customer support turns a missing bolt from a crisis into an inconvenience. Look for a clear route to obtaining parts before you need one. This is easy to check while you’re comparing and impossible to arrange retrospectively when a package arrives incomplete on a Sunday.
Setting Realistic Expectations
If you want the trampoline usable the same day, work backwards from the honest estimate rather than the optimistic one.
Manufacturers that state an assembly time transparently, and whose design choices actually support that claim, are more reliable than those that stay vague. Vagueness usually means the answer isn’t flattering. Assume the enclosure will take longer than you think, allow for the spring installation being tedious, and start earlier in the day than feels necessary.
The Short Version
Assembly difficulty is not a separate concern from build quality. It’s a visible symptom of it. A trampoline that goes together cleanly, with parts that fit and instructions that make sense, is usually one that was designed carefully throughout.
Read the assembly section of owner reviews before you buy. It’s the part of the product experience that listings describe least honestly and owners describe most honestly.
FAQs on Trampoline Assembly
01. How long does it take to assemble a trampoline?
It depends heavily on size and design. Small indoor models can go up relatively quickly. Full-size backyard trampolines with enclosures usually take considerably longer, and some designs are specifically engineered to cut that time down.
02. Do I need special tools?
Most trampolines are built with standard household tools. Spring installation is much easier with a spring tool if one is included in the kit. Follow the manufacturer’s tool guidance rather than improvising.
03. Which part of assembly is usually hardest?
Spring tensioning and enclosure installation, for most families. Both get slower when parts aren’t clearly labelled or when the enclosure wasn’t designed to integrate well with the frame.
04. Is a bigger trampoline harder to assemble?
Usually, yes, because there are more springs, more frame segments and a larger net. But a model engineered for quick assembly can reduce how much the size actually affects your afternoon.
Author & Expert Review
Written By:  Nidhi Patel | Civil Engineer & Content Writer

| Credentials: B.E. (Mahatma Gandhi Institute of Technical Education and Research Centre), Registered with Gujarat Technological University (GTU). Experience: Civil Engineer with 3+ years of content writing experience, currently writing blogs for Gharpedia, part of SDCPL. Expertise: Specializing in SEO-optimized blogs and long-form articles focused on home improvement, construction, interiors and architect topics. I create well-researched, reader-focused content that balances technical accuracy with clarity, making complex subjects easy to understand. Find her on: LinkedIn |
Verified By Expert: Farhan Shaikh – Senior Manager – Architect, SDCPL | Associate Member – IIA

This article has been reviewed for architectural and interior design accuracy by Farhan Shaikh, Senior Manager – Architect at Sthapati Designers & Consultants Pvt. Ltd. As the lead for all architectural and interior projects at SDCPL and an Associate Member of the Indian Institute of Architects (IIA), he brings hands-on experience in architectural planning, interior design, project coordination, and sustainable strategies. His review ensures the content reflects practical design considerations, industry best practices, and real-world applicability across both architecture and interior spaces.
Find him on : Linkedin